
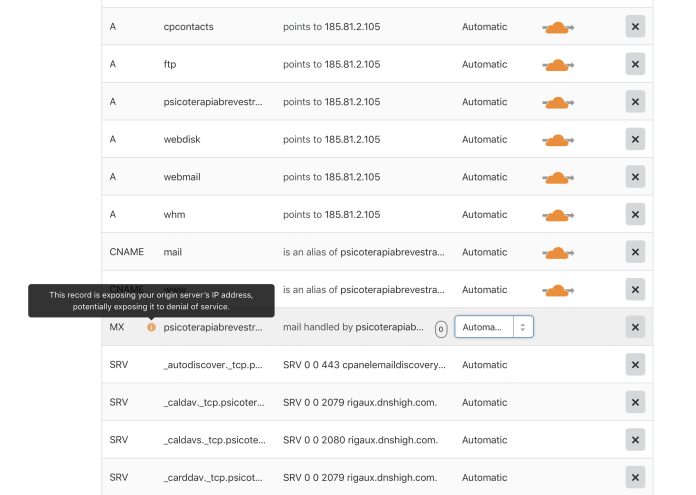
Migrating your domain’s DNS records from cPanel to Cloudflare using nameservers is broken down into three distinct scenarios: newly established websites, existing websites transitioning to a new host, and domains registered directly through Cloudflare.
Step by step method to easily import dns records to Cloudflare accounts.
Scenario 1: For Sites and Domains New to Cloudflare
If your website is entirely new to the Cloudflare network, execute the following steps to bring over your DNS records:
- Direct Your Traffic: Access your domain registrar dashboard and configure your domain to point to your hosting provider using the nameservers supplied by your host.
- Verify Site Status: Confirm that your website is fully active and functioning correctly before setting up or signing into a Cloudflare account.
- Register or Sign In: Create a new Cloudflare account or log into your existing profile, then add your domain via the main dashboard.
- Select a Plan: Choose between the free tier or any available paid subscription tier, proceeding until you reach the screen displaying your assigned Cloudflare nameservers.
- Update Registrar Settings: Return to your domain registrar, navigate to your domain manager, and open the DNS or nameservers section.
- Swap Nameservers: Delete your current hosting nameservers, substitute them with the ones provided by Cloudflare, and save your changes.
- Confirm Configuration: Head back to your Cloudflare setup page and click the verification button to confirm the nameserver update.
- Import Records: Cloudflare will present an automated option to pull DNS entries from your host. Accept the prompt, wait for completion, review the populated records, and save.
- Troubleshoot Warnings: Should any alerts appear regarding missing or incorrect entries, cross-reference your records with your cPanel Zone Editor and manually add any omitted data.
- Final Success: You have successfully migrated your DNS settings to Cloudflare.
Scenario 2: For Existing Sites Migrating to a New Host
If your website is already active on Cloudflare but you have recently moved to a new hosting provider, follow this procedure:
- Point to New Host: Log into your domain registrar account, input the nameservers from your new hosting provider into the DNS/nameservers section, and save.
- Test Functionality: Ensure your website loads properly before deleting the domain from your Cloudflare profile.
- Reset on Cloudflare: Once verified, remove the domain from your Cloudflare dashboard, then re-add it as a fresh entry.
- Select Service Tier: Choose a free or paid tier, navigating through the prompts until you reach the page displaying your new Cloudflare nameservers.
- Reapply Cloudflare Nameservers: Go back to your domain registrar, open your DNS settings, and replace your host nameservers with your Cloudflare nameservers. Save the updates.
- Verify the Update: Return to Cloudflare and confirm that you have updated the nameservers.
- Import New Records: Select the automated option to import DNS records from your host, accept the transfer, and save the finalized records.
- Double-Check Performance: Refresh your site or open an incognito window to confirm it runs smoothly. You can also utilize a third-party DNS lookup utility to verify your Cloudflare nameserver propagation.
- Address Missing Entries: If a notification flags unimported records, check your cPanel Zone Editor to manually copy and update any missing entries.
Read Also: Is Wrestling Real or Fake? Fact About WWE, Etc
Scenario 3: For Domains Whose Registrar is Cloudflare
For webmasters managing domains registered directly through Cloudflare, the transition to a new host requires a more technical file-import approach:
- Generate cPanel Backup: Log into cPanel and execute a full domain backup.
- Locate the Archive: Access the downloaded archive on your desktop. The backup file is typically a tarball (
.tar) compressed with gzip (.gz). - Extract DNS Data: Open the archive file and extract the text file containing your domain’s DNS records to a local folder on your computer.
- Access Cloudflare DNS: Log into your Cloudflare account, select your domain from the dashboard, and click DNS on the sidebar menu.
- Upload the Record File: Locate the import DNS record tool near the top of the page.
- Import and Save: Select your extracted text file, finalize the upload process, and save your changes to fully populate your DNS records.
You can request our service incase the steps looks confusing to you.
N/B: the process might look confusing for a newbie, look for a professional to help you with the entire process.
Follow us on X.

